Classrooms
Classrooms for Teachers
These instructions will guide you, the instructor, through the following processes:
- Creating a classroom
- Adding students
- Creating assignments
- Editing assignments and starter projects
- Providing feedback on assignments
- Submitting assignments as complete
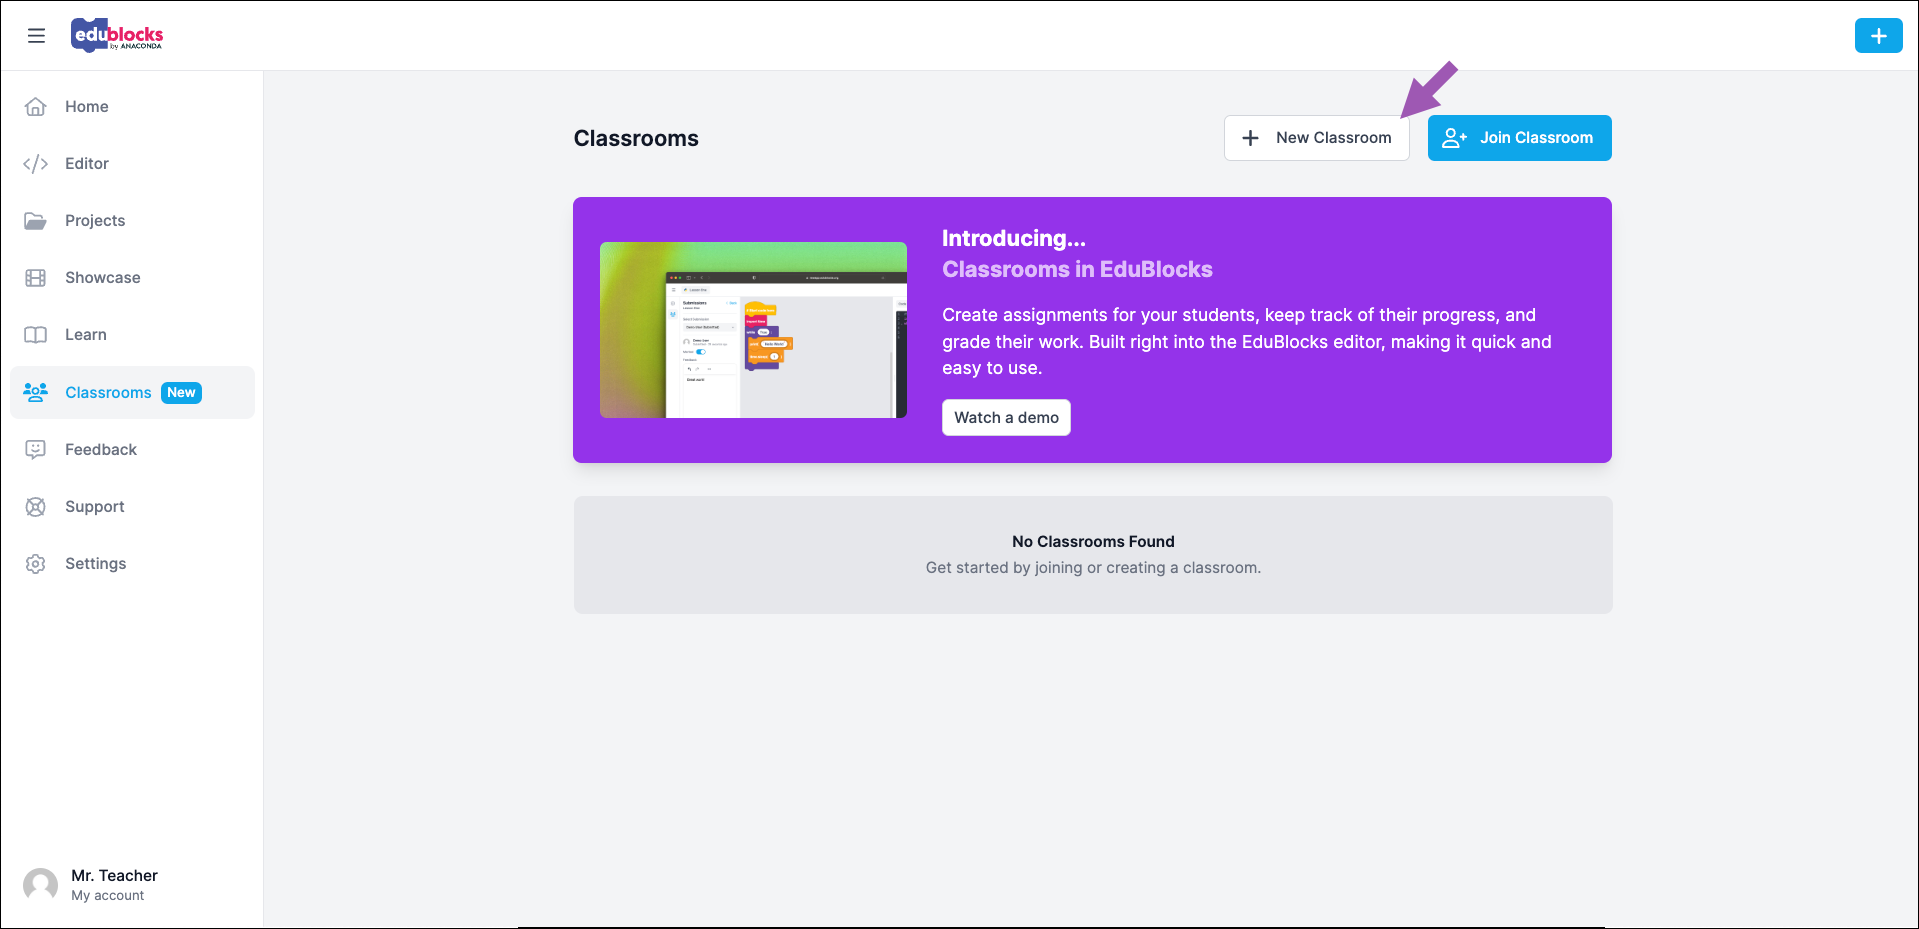
Creating a classroom
On the Classrooms page, click New Classroom.
Provide a name for your classroom, then click Create. You are directed to your newly created classroom.
You can find and access all your classrooms by returning to the Classrooms page.
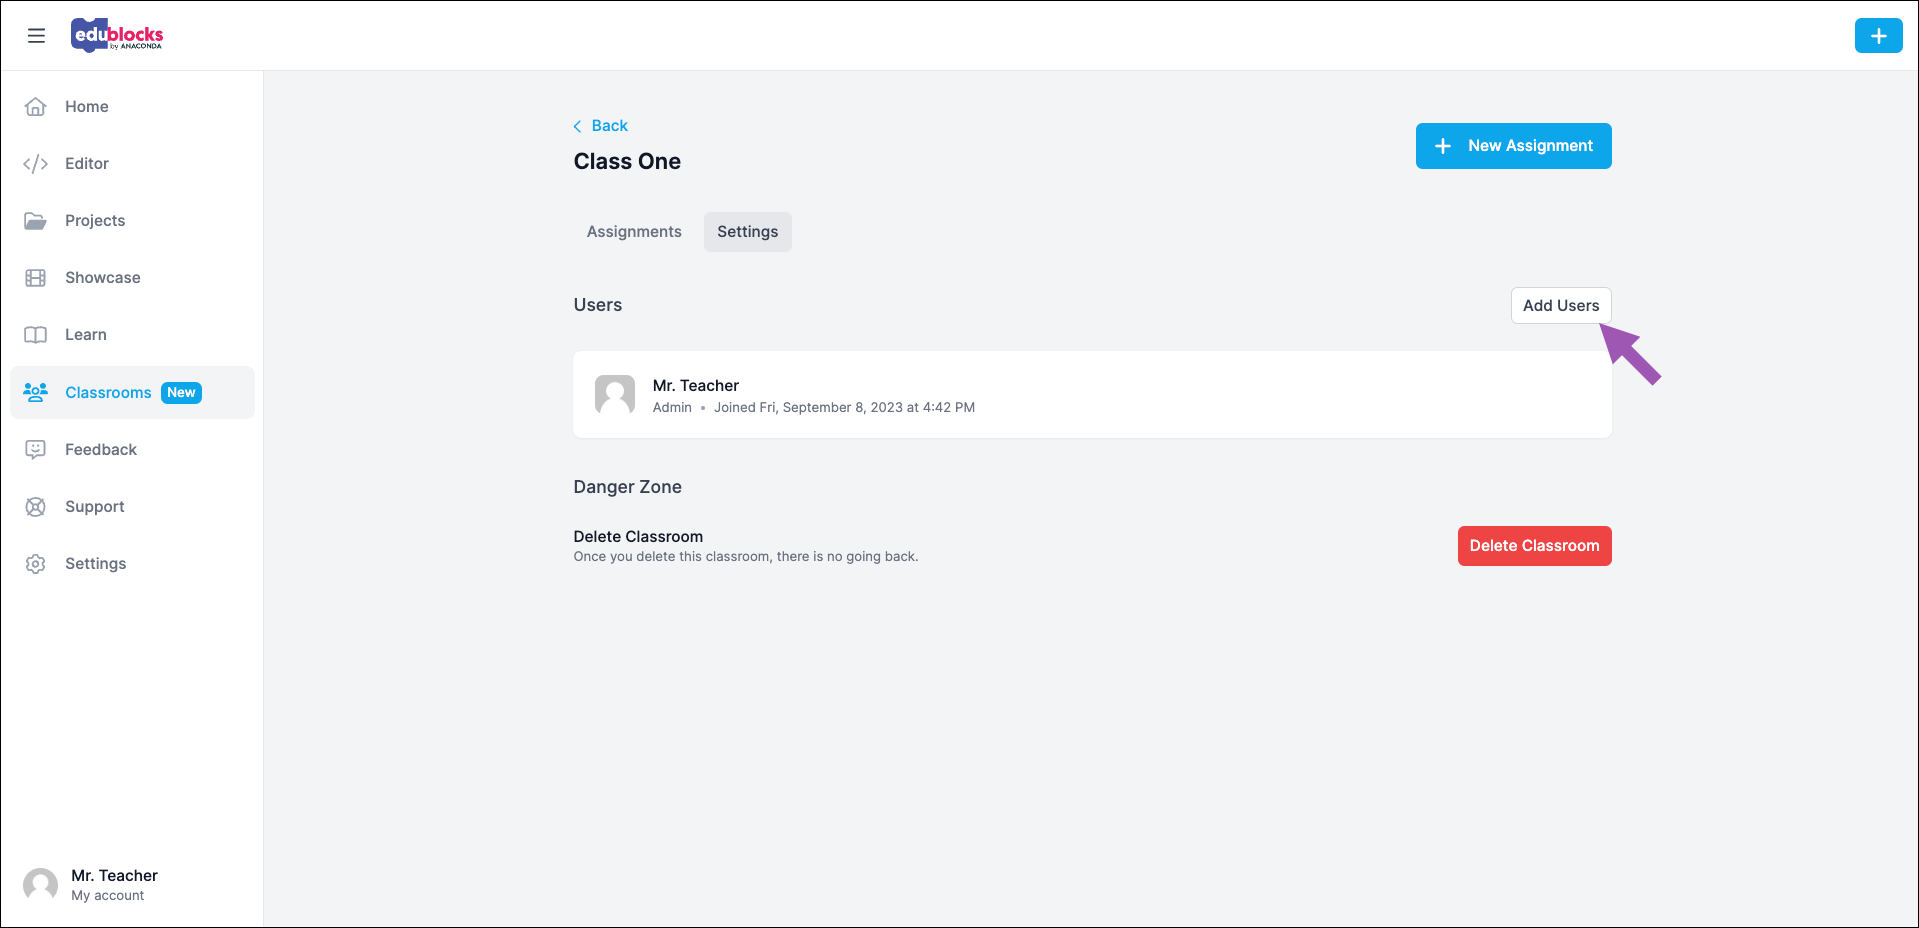
Adding students
Under the Settings tab, click Add Users.
You are presented with a unique code, which acts as a key to access your classroom.
To copy the link, click Copy Link.
Using your preferred means of secure communication, share the classroom code with your students.
Students will not appear in the Users section until they have joined your classroom with the classroom code.
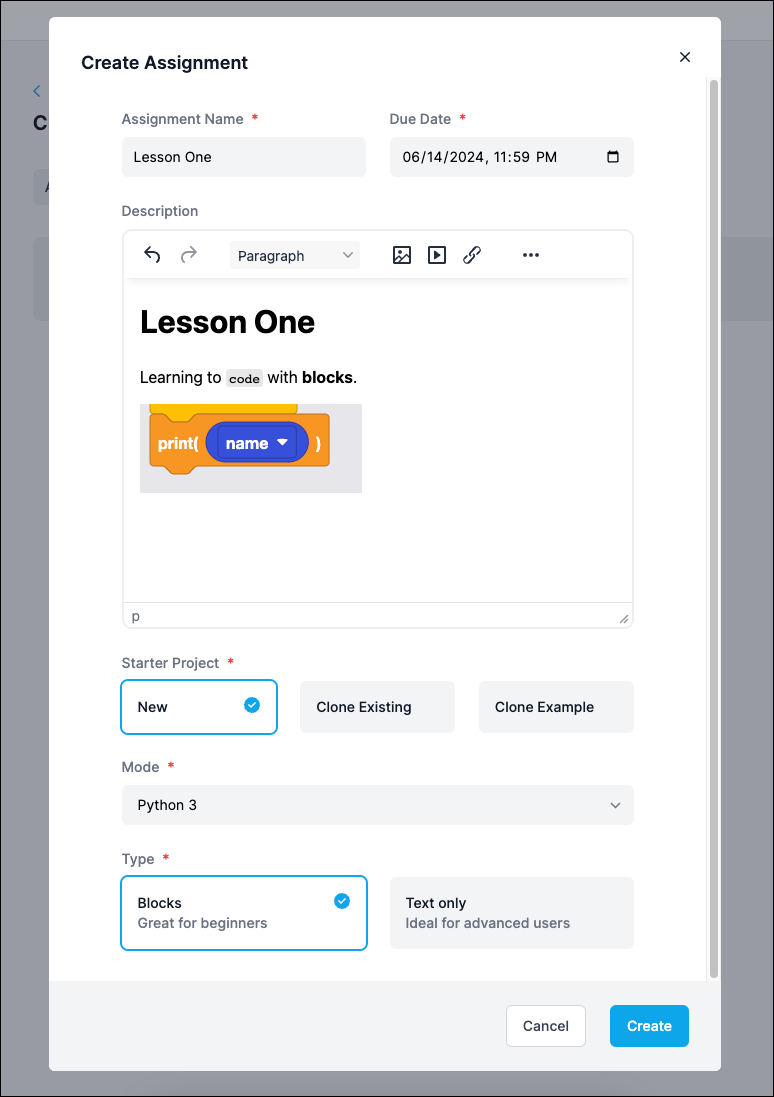
Creating assignments
Navigate to your classroom and click New Assignment.

Provide a name and due date for your assignment. Make sure to specify the exact time by which you would like assignments submitted.
Enter instructions for your assignment. To help communicate your intent for the assignment, this powerful WYSIWYG editor allows you to format text; add screenshots, links, and tables; and even embed videos.
Select a brand new starter project, clone one of your existing projects, or clone an example project produced by EduBlocks.
Select a mode for your project.
Choose whether your students can code using blocks as well as text, or text only.
Click Create.
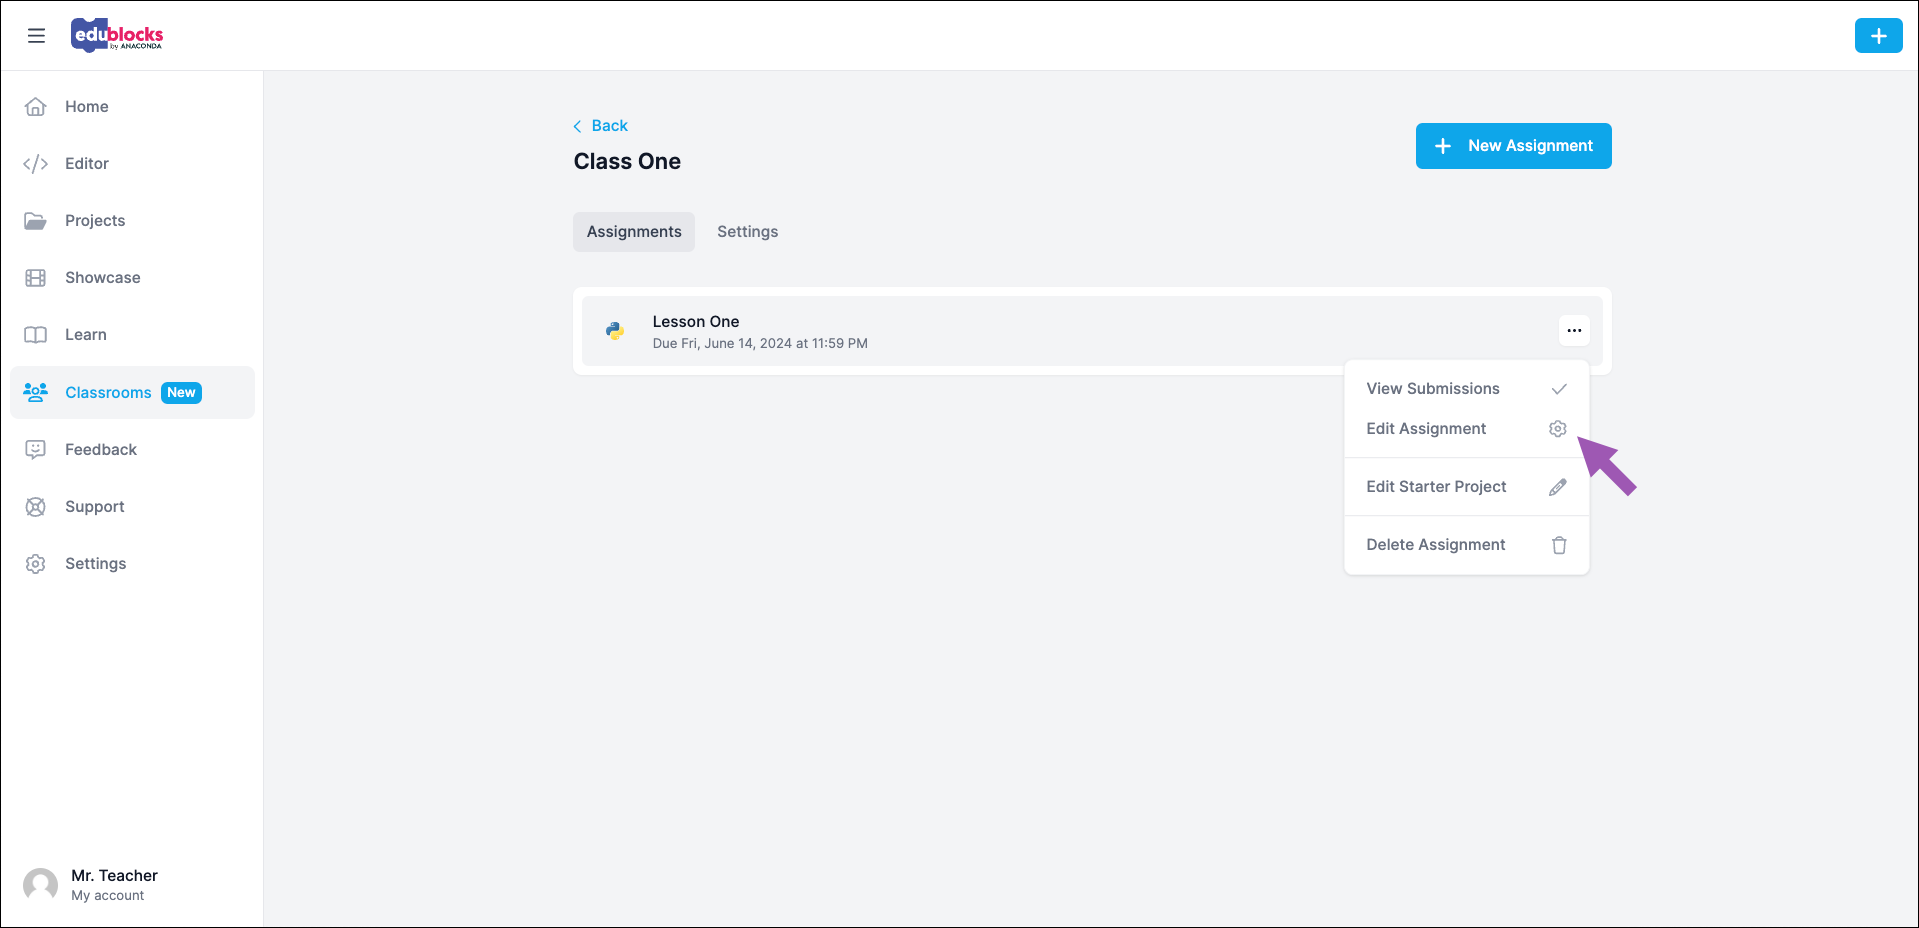
Editing assignments
Click the actions ⋮ icon beside your assignment, then select Edit Assignment in the dropdown.
Edit the assignment name, due date, and instructions as needed.
Click Save.
Editing starter projects
You can provide students with a head start by building a starting template in the editor.
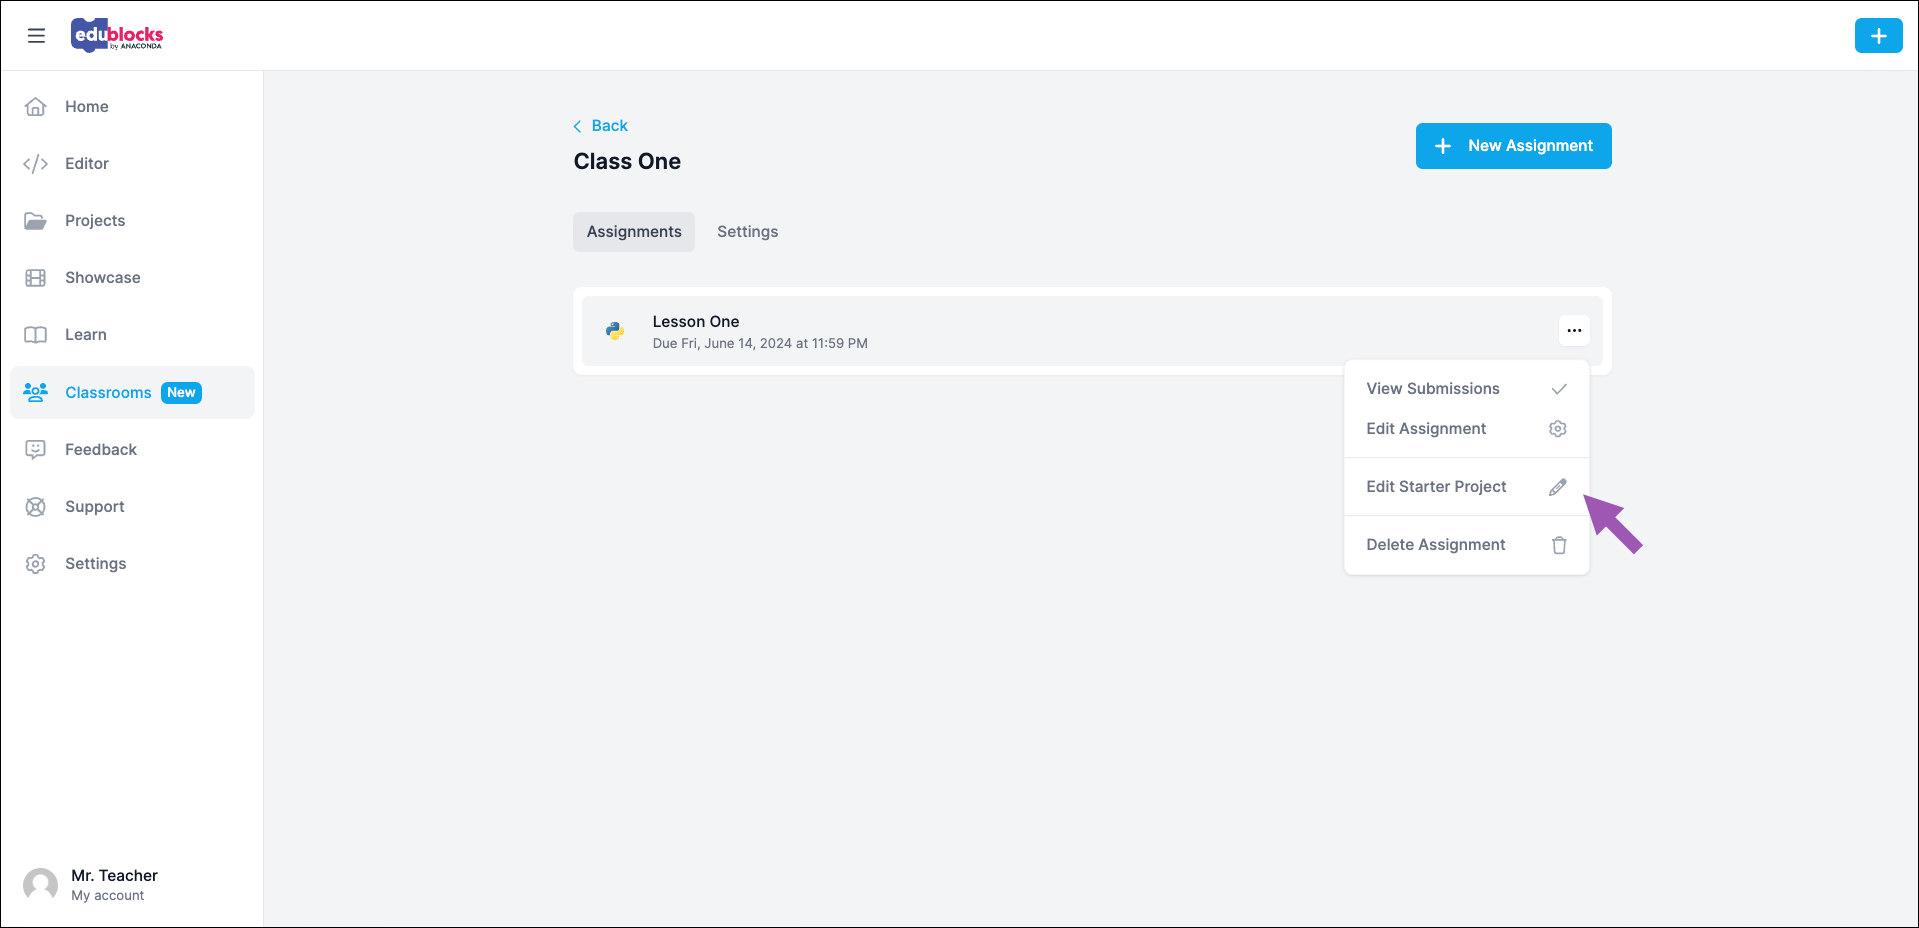
Click the actions ⋮ icon beside your assignment, then select Edit Starter Project in the dropdown.
Add blocks to form your program, which can be seen in code form in the Code panel to the right.
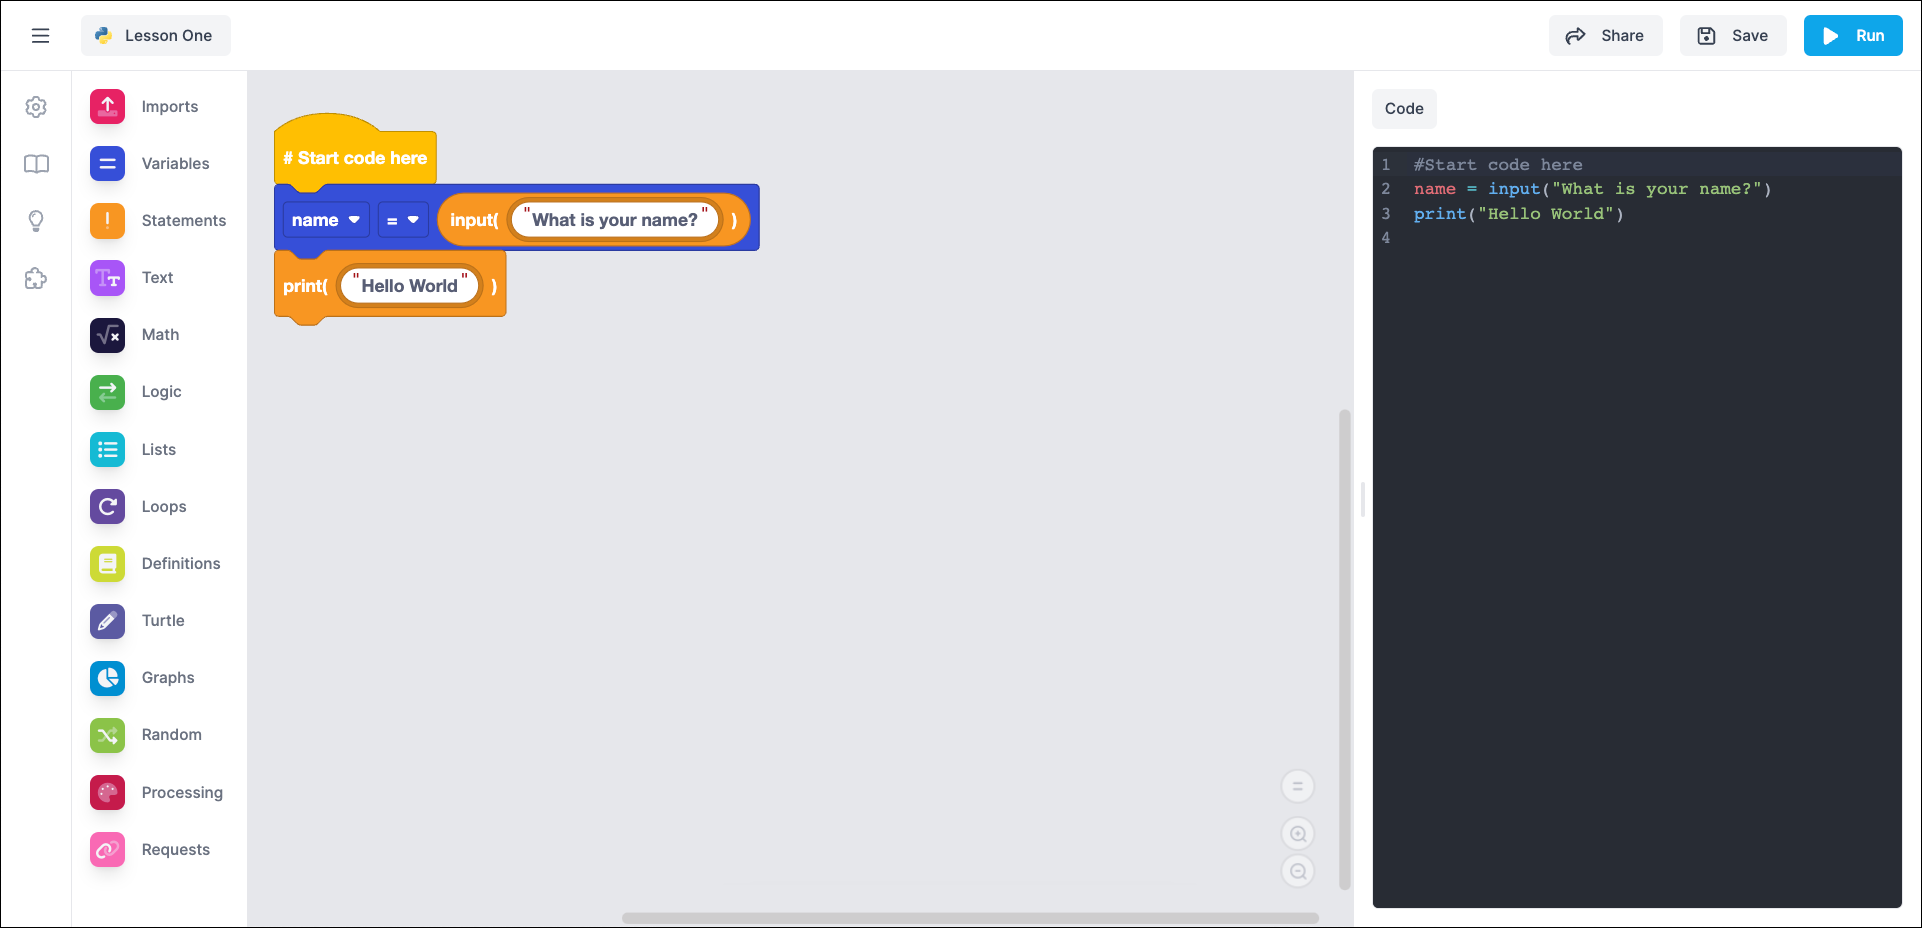
In this example, we’ve created a variable called
nameset to input, which prompts the user to provide their name. The assignment calls for the student to update theprintstatement to print name.Click Save.
Tests
Tests in EduBlocks allow you to automatically test your students' work by checking the output of their code.
Tests work with both blocks-based and text-based Python assignments.
You'll need to be using Chrome 96 (November 2021) or newer. You can also use Microsoft Edge or other Chromium based browsers.
Create Tests
Click the actions ⋮ icon beside the assignment you wish to create Tests for, then select Edit Starter Project.
Select the Tests option in the sidebar.
Click the + icon to create a new Test.
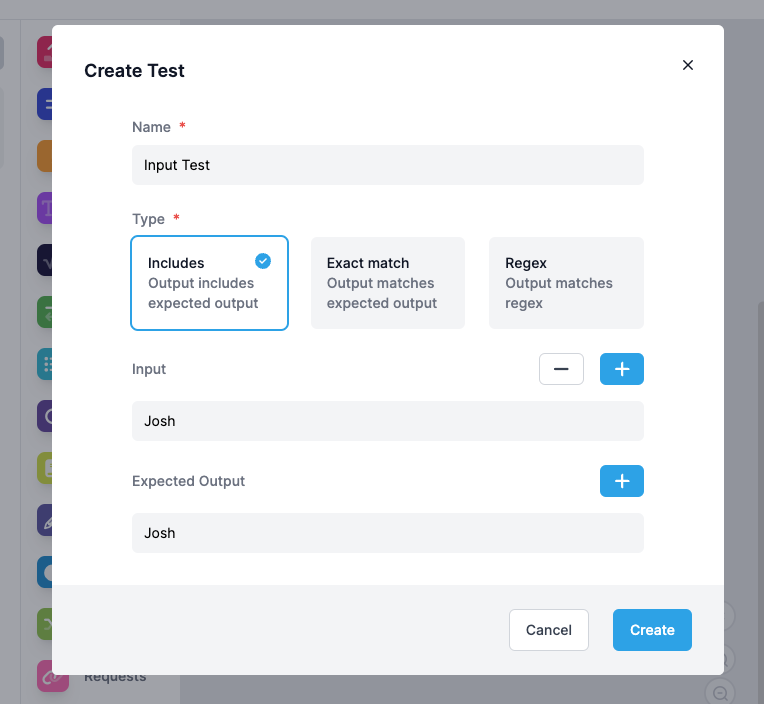
Provide a name for the Test.
Select the type of Test you wish to create:
- Includes: Passes if the output you specify is included in the output when the Test is run.
- Exact: Passes if the output you specify exactly matches the output when the Test is run.
- Regex: Passes if the output when the Test is run matches a regular expression. For example, a regex pattern of \bhello\b would match hello.
If the code you will be testing expects input, for example when you use the
input()command, you can specify what you would like the test runner to automatically type. Input variables will be used in the order in which you specify and you can use the + and - icons to add/remove them. Specifying input variables is optional.Specify the output you expect to recieve and would like to test against. You can use the + and - icons to remove add/remove items.
Click Create.
Run Tests
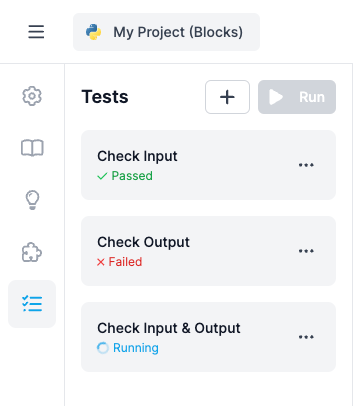
All of the Tests for the current project will appear within the Tests menu.
To run all of the Tests, it's as simple as clicking the Run button at the top of the Tests menu.
There are three different statuses that a Test can have:
- Running
- Passed
- Failed
You will see the status of each Test underneath it's name after you click the Run button.
Review submitted assignments
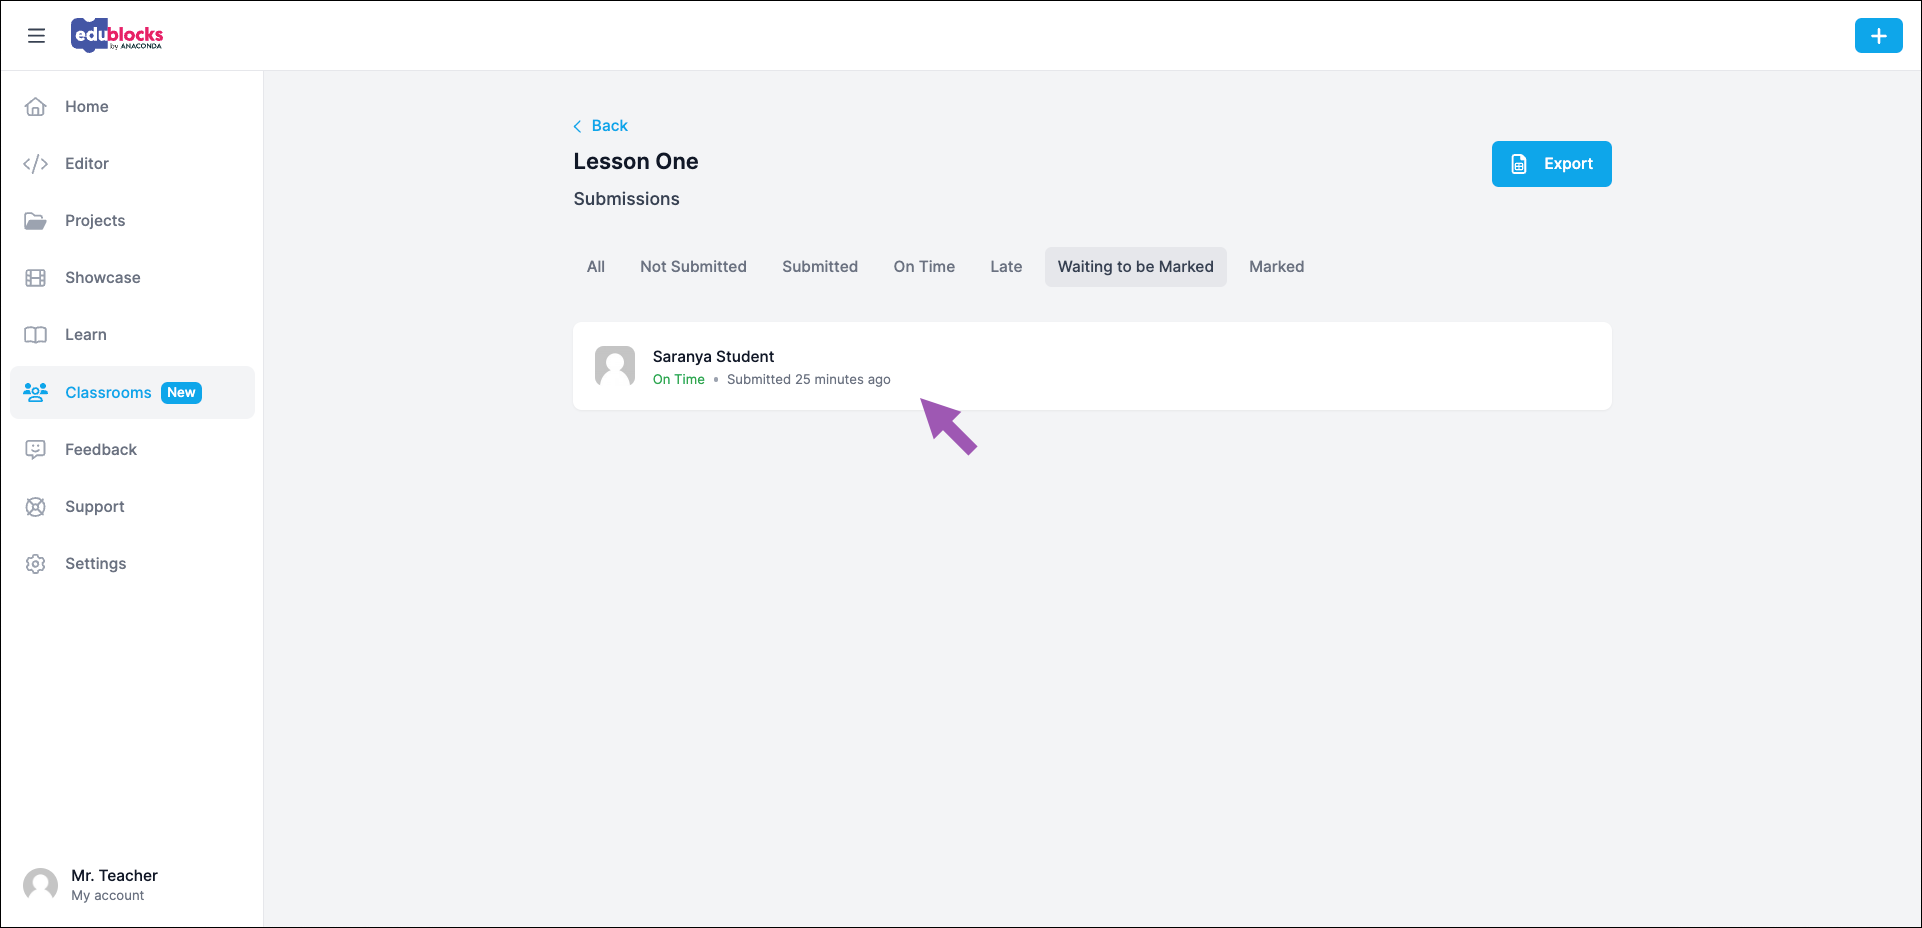
From the Assignments tab, click the assignment you want to review submissions for.
You can find assignments that students have submitted and need reviewing by clicking Waiting to be marked. Click a student’s assignment to open it.
The assignment opens in a read-only view with a new Submissions panel to the left.
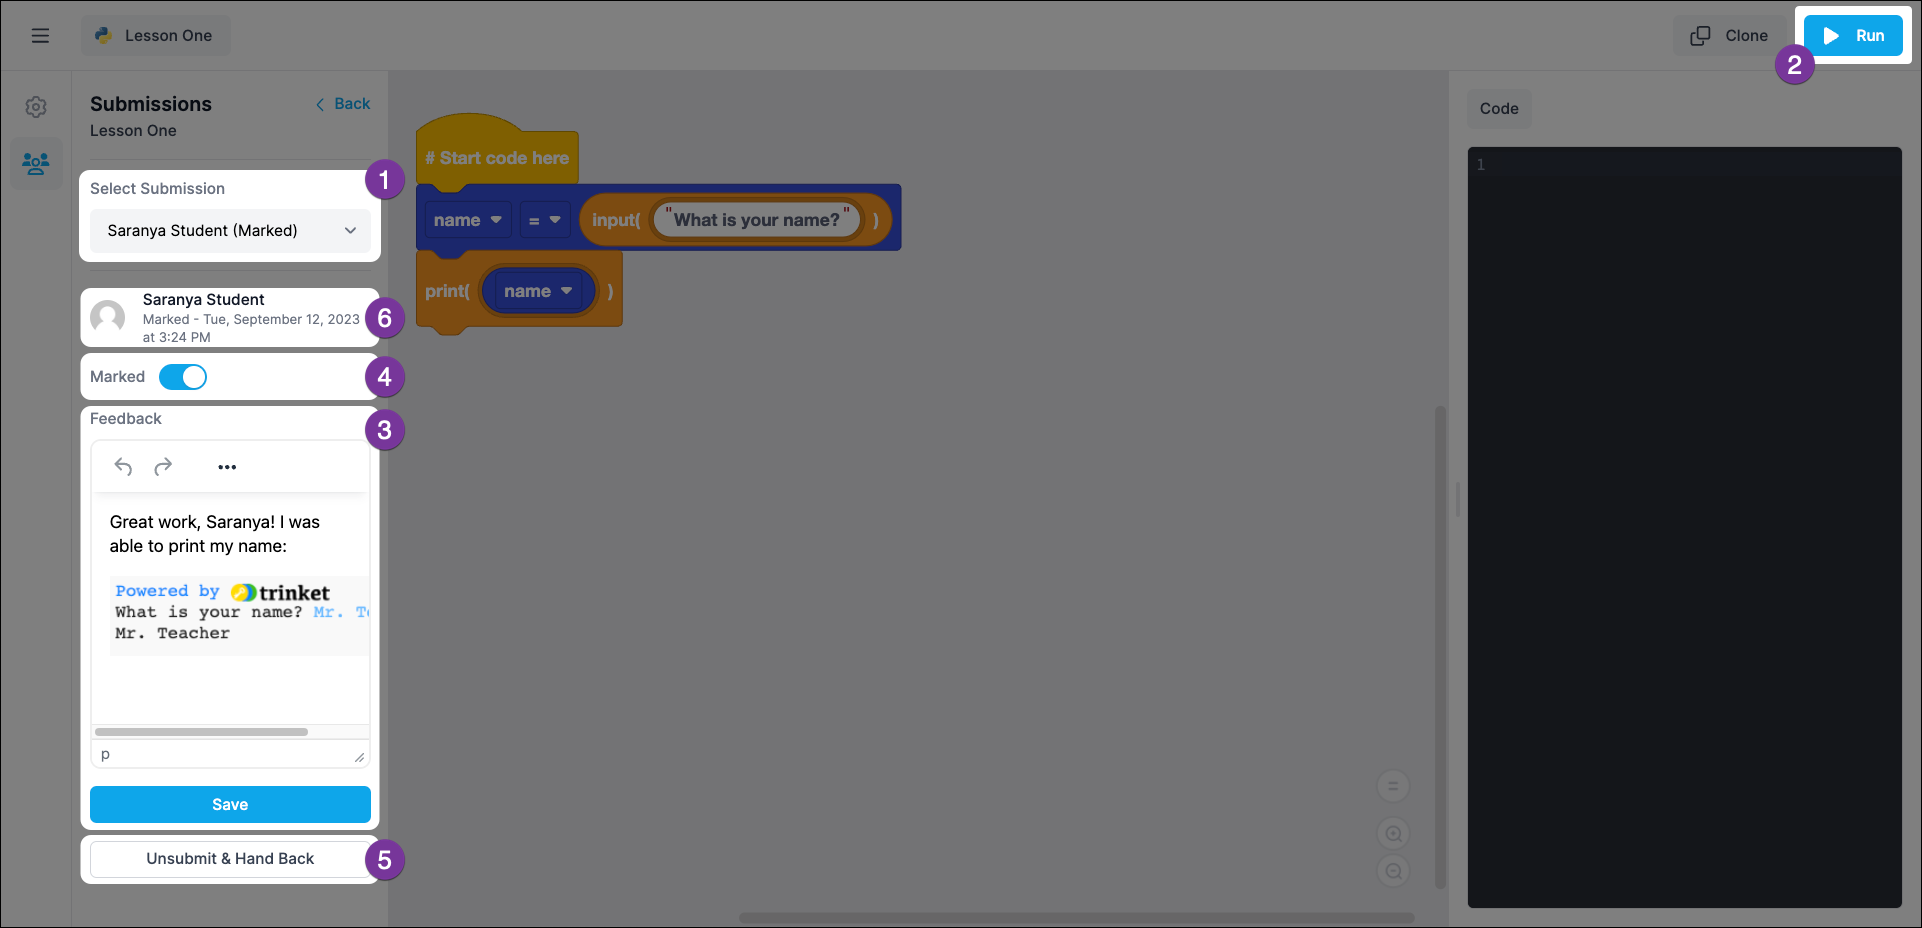
- Select Submission Quickly switch between submitted assignments.
- Run Click to test the student's code.
- Feedback Submit your feedback to the student, then click Save.
- Marked If the work satisfies your expectations, turn on the toggle. The assignment will remain in Waiting to be marked until you take this step.
- Unsubmit & Hand Back If the work is unsatisfactory, click to return to the student for revision.
- Student Status View the status of the assignment below the student’s name. The assignment can subsequently be found under the applicable tab of the assignment page.